
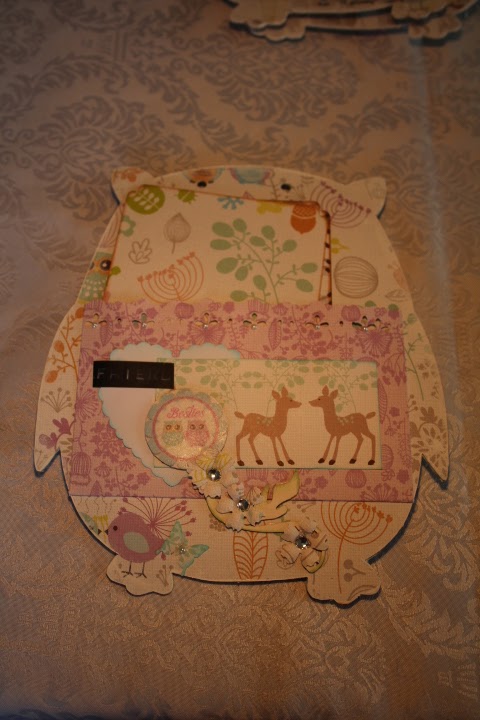
C92 WOODLANDS FRIENDS COLLECTION
Tag – Best
Friends
by LISA-MARIE WATLING

Materials:
Fabscraps Medium
Blue Cardstock
Fabscraps
C92 003 Sprinkles
Fabscraps C92 005
Merry Weather
Fabscraps
C92 008 Fairy Dust
Fabscraps
ST92 001 Sticker Sheet
Fabscraps
ST92 002 Sticker Sheet
Fabscraps
MC92 001A Carders Pack
Pale mauve
cardstock
Mauve chalk
Glitter glue
: blue, pink, white and green
Gauze
Foam dots
Double sided
tape
Tombow
Ribbon
Method
·
From your Fabscraps cardstock, cut a tag
measuring 4 x 8 inches; punch a hole in the upper section
·
Cut a piece of mauve cardstock down to measure 3
¾ x 7 ¾ inches and match the upper end of your tag; distress the edges and
adhere it to your base tag
·
Cut C92 008 (mauve side up) to measure 3.5
x 7.5 inches and match the upper end of your tag; chalk with mauve and distress
the edges; adhere to your base tag
·
Select one of the tags from your carders pack
(plain side up); distress the edges and then adhere it to C92 005 (trees
side up); fussy cut around the edges and then adhere to the left hand portion
of your tag
·
Adhere the ‘best friends’ sticker from
ST92 002 to a discarded piece of paper from your carders pack (plain side
up); fussy cut it out. Adhere this to a
piece of mauve cardstock and fussy cut it out.
Adhere this to a piece of leftover blue cardstock and fussy cut it
out. Finally, adhere this to a piece of
paper from your carders pack – I selected the piece with the single peach tree;
fussy cut out. Set aside
·
Adhere the row of birds from your ST92 001
sticker sheet to a piece of paper from your carders pack (plain side up). Cut it out and round of both short edges (as
shown). Adhere this to a strip from
C92 003 (teal side up) and fussy cut out to; adhere a double layer of
gauze to the back of this, using double sided tape
·
Adhere your row of birds piece to the lower
right hand portion of your tag, so that it overlaps the adhered die cut tag
·
Adhere your ‘best friends’ sticker creation to
the far left of your die cut tag (it will overlap the row of birds slightly)
using foam dots
·
To finish – highlight some of the birds and
features with corresponding coloured glitter glue. Thread some ribbon through the tag hole


